Real Device Testing: XCUITest + Firebase Test Lab + GitHub Actions
In the realm of software quality assurance (QA), the integrity of iOS applications is a top priority. Leveraging automated testing within the development process stands out as a powerful method to uphold this standard. This blog post will delve into setting up Real Device testing using Firebase Test Labs and XCUITest in GitHub Workflows, enhancing the efficiency of iOS app testing within your CI/CD pipeline.

Why Firebase Test Lab (FTL)?
Firebase Test Lab offers an extensive collection of real devices for automated testing of Android and iOS mobile apps. Its comprehensive device library enables teams to conduct tests over a wide array of configurations, promoting extensive test coverage and quicker feedback cycles. Although FTL is a notable option for mobile iOS automation, it’s important to recognize the presence of alternative cloud-based testing platforms in the industry, including
I should also mention some limitations with FTL that are worth mentioning:
- Lack of an in-built mechanism for Test Sharding or Splitting.
- Absence of a Retry Feature for tests that fail.
- Unavailability of Simulators for iOS XCUITest at the time of writing this blog.
- FTL doesn’t re-sign the app on their end.
Step-by-Step guide to Integrate Firebase Test Lab with XCUITest in GitHub Workflows
I have complete source code available for you for the demo project (link below)
1.) Create New Project:
Begin by creating new project onFirebase, it’s free.

2.) Test Lab:
Once project created, you will “Test Lab” shortcut in left navigation menu. The No Cost (Spark Plan). offers 5 tests/day, you can visit FTL Pricing for more details.

3.) Download Google Service Account Key JSON:
(i) Navigate to the Firebase Project Settings > Service Accounts
(ii) Under “Firebase Admin SDK”, click “Generate new private key”.
(iii) to generate private key required for gcloud at later steps.
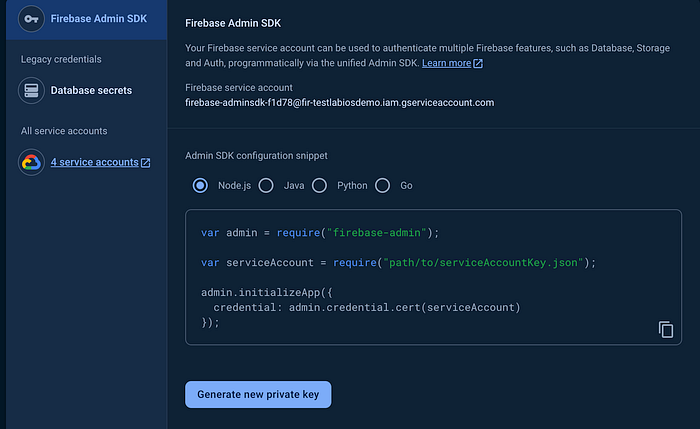
Copy the downloaded JSON file’s contents into a new secret variable named `GCP_CREDENTIALS` within your GitHub repository’s secrets section.
4.) Preparing the Builds for Testing:
Our initial task is to prepare the Test App and UIRunner files for Firebase Test Lab, and then zip them for upload. To begin, let’s craft a new file named “prepareTestBuild-rdc.sh” in your root directory.
Here are the contents of prepareTestBuild.sh file to prepare build to run on Simulators:
#!/bin/bash
# Prepare the testing builds

xcodebuild \
  build-for-testing \
  -project FirebaseTestLabiOSDemo.xcodeproj \
  -scheme "FirebaseTestLabiOSDemo" \
  -sdk iphoneos \
  -configuration Debug \
  -derivedDataPath './customFolder-rdc' \
  -allowProvisioningUpdates
  DEVELOPMENT_TEAM="$DEVELOPMENT_TEAM" \
  CODE_SIGN_IDENTITY="$CODE_SIGN_IDENTITY"

# Define the base directory for builds
buildDir="customFolder-rdc/Build/Products"

# Navigate to the build directory
cd "$buildDir" || exit

# Create a ZIP archive of the FirebaseDemoTests and the .xctestrun file
# This assumes both the Debug-iphoneos directory and the .xctestrun file exist and are correctly named
zip -r FirebaseDemoTests.zip Debug-iphoneos FirebaseTestLabiOSDemo_FirebaseTestLabiOSDemo_iphoneos17.2-arm64.xctestrun

# Navigate back to the script's starting directory
cd - || exit

# Check if the AppsToTest-rdc directory exists
# If it doesn't, create it. If it does, clear its contents to ensure it's empty.
appsToTestDir="AppsToTest-rdc"
if [ ! -d "$appsToTestDir" ]; then
    mkdir -p "$appsToTestDir"
else
    rm -rf "$appsToTestDir"/*
fi

# Copy the built tests.zip file to the AppsToTest-rdc folder
cp "$buildDir/FirebaseDemoTests.zip" "$appsToTestDir/"
Create GitHub Repo’s secret variables:
(i) DEVELOPMENT_TEAM:
If you don’t know your dev team id, run below command to find:
grep DEVELOPMENT_TEAM FirebaseTestLabiOSDemo.xcodeproj/project.pbxproj(ii) CODE_SIGN_IDENTITY:
Run below command to find the Code Signing Identity if not known
security find-identity -v -p codesigningNow, let’s execute the script “prepareTestBuild-rdc.sh” to generate “FirebaseDemoTests.zip” within the designated “AppsToTest-rdc” folder.
#For Real Devices
sh repareTestBuild-rdc.sh
Optional: Run with Firebase Console
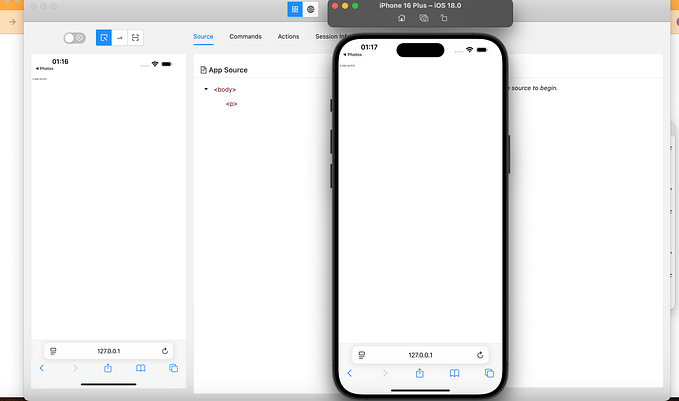
At this point, it’s possible to execute the XCUITest on Firebase Test Lab through the Console by uploading the .zip file and choosing the device. Learn more
However, if you’re interested in incorporating this into our CI/CD pipeline for headless execution of FTL tests via the Google Cloud CLI, please proceed with the following steps.
5.) Install Google Cloud CLI
What is Google Cloud CLI: The Google Cloud CLI is a set of tools to create and manage Google Cloud resources. We will be using it to initiate the tests on Firebase Test Lab.
Steps:
(i) Download Google Cloud SDK
(ii) Login to Google Cloud CLI
gcloud auth login(iii) Set your Firebase project in gcloud
gcloud config set project {your-project-id}Where {your-project-id} is Firebase Project Id, you can grab from Project Settings > General page (Look for Project ID)
Google Cloud CLI configuration steps from official website: https://firebase.google.com/docs/test-lab/ios/command-line
6.) Executing Tests:
Now, it’s time to perform a test run to verify the setup we’ve completed thus far.
(i) Prepare App & UITests-Runner files
# For Real Devices
sh prepareTestBuild-rdc.sh
(ii) Upload files to Firebase Test Lab for execution via gcloud cli
gcloud firebase test ios run --test AppsToTest-rdc/FirebaseDemoTests.zip \
        --device model=iphone11pro,version=14.7,locale=en_US,orientation=portrait \
        --device model=iphone12pro,version=14.8,locale=as_IN,orientation=portrait \
        --device model=iphone14pro,version=16.6,locale=en_US,orientation=portrait \
        --device model=ipad5,version=15.4,locale=en_US,orientation=landscape
In above example, every single test will be executed on each of the device specified.
Breakdown of devices passed in above gcloud cli:
device model: You can run `gcloud firebase test ios models list` to list the available devices on FTL, and their OS version.
locale: en_US (English US)
orientation: portrait or landscape
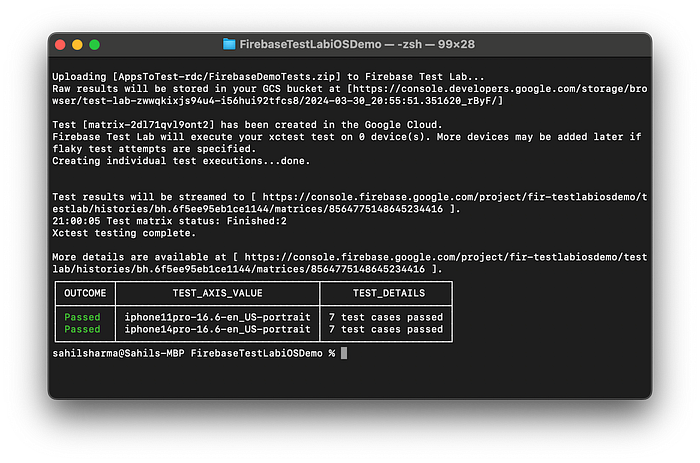
Firebase Test Lab Console:
7.) Integration with GitHub Workflows:
Next, let’s integrate this with the GitHub workflows. I opted for GitHub due to its cost-free nature. However, it’s worth noting that FTL can be integrating any CI/CD tools, including GitLab, Azure, Bitbucket, Jenkins, CircleCI, TeamCity, and etc.
name: Firebase Test Lab

on:
  pull_request:
    branches:
      - main

jobs:
  test:
    runs-on: macos-latest

    steps:
    - uses: maxim-lobanov/setup-xcode@v1
      with:
        xcode-version: '15.2'

    - name: Checkout code
      uses: actions/checkout@v4

    - name: Setup Code Signing
      env:
        APPLE_CERTIFICATE: ${{ secrets.APPLE_CERTIFICATE }}
        PROVISIONING_PROFILE_1: ${{ secrets.PROVISIONING_PROFILE_1 }}
        PROVISIONING_PROFILE_2: ${{ secrets.PROVISIONING_PROFILE_2 }}
        PROVISIONING_PROFILE_3: ${{ secrets.PROVISIONING_PROFILE_3 }}
        CERTIFICATE_PASSWORD: ${{ secrets.CERTIFICATE_PASSWORD }}
      run: |
        echo "$APPLE_CERTIFICATE" | base64 --decode > ./certificate.p12
        echo "$PROVISIONING_PROFILE_1" | base64 --decode > ./profile1.mobileprovision
        echo "$PROVISIONING_PROFILE_2" | base64 --decode > ./profile2.mobileprovision
        echo "$PROVISIONING_PROFILE_3" | base64 --decode > ./profile3.mobileprovision
        security create-keychain -p "" build.keychain
        security import ./certificate.p12 -t agg -k ~/Library/Keychains/build.keychain -P "$CERTIFICATE_PASSWORD" -A
        security list-keychains -s ~/Library/Keychains/build.keychain
        security default-keychain -s ~/Library/Keychains/build.keychain
        security unlock-keychain -p "" ~/Library/Keychains/build.keychain
        mkdir -p ~/Library/MobileDevice/Provisioning\ Profiles
        cp ./profile1.mobileprovision ~/Library/MobileDevice/Provisioning\ Profiles/
        cp ./profile2.mobileprovision ~/Library/MobileDevice/Provisioning\ Profiles/
        cp ./profile3.mobileprovision ~/Library/MobileDevice/Provisioning\ Profiles

    - name: Prepare Test Build
      env:
        DEVELOPMENT_TEAM: ${{ secrets.DEVELOPMENT_TEAM }}
        CODE_SIGN_IDENTITY: ${{ secrets.CODE_SIGN_IDENTITY }}
      run: |
        chmod +x prepareTestBuild-rdc.sh
        ./prepareTestBuild-rdc.sh

    - id: 'auth'
      uses: 'google-github-actions/auth@v2'
      with:
        credentials_json: '${{ secrets.GCP_CREDENTIALS }}'

    - name: 'Set up Cloud SDK'
      uses: 'google-github-actions/setup-gcloud@v2'

    - name: Set current project
      run: gcloud config set project ${{ secrets.FIREBASE_PROJECT_ID }}

    - name: Run Tests on Firebase Test Lab
      run: |
        gcloud firebase test ios run --test AppsToTest-rdc/FirebaseDemoTests.zip \
        --device model=iphone11pro,version=16.6,locale=en_US,orientation=portrait \
        --device model=iphone14pro,version=16.6,locale=en_US,orientation=portrait
The “Setup Code Signing” step deserves special attention because it’s crucial for real device testing that both the Test app and the UITests-Runner file are correctly signed. During the execution of prepareTestBuild-rdc.sh on a local machine, xcodebuild will automatically utilize the provisioning profiles found in ~/Library/MobileDevice/Provisioning Profiles. However, this process might encounter issues on GitHub's macOS runner as you’re not logged in the macOS runner.
To address this challenge, there are several strategies. One approach involves generating provisioning profiles through the Apple Developer Program portal and applying those. In my experience, a practical solution was to base64 encode the provisioning profiles along with my Apple development certificate and store them in GitHub’s secret variables.
Below are the steps on how to find the provisioning profile & apple certificate for the code signing step:
(i) Finding your project’s provisioning profiles:
a. Go to ‘~/Library/MobileDevice/Provisioning Profiles’
b. Run the following command to view the contents of the provisioning profile (to ensure it’s the correct one):
security cms -D -i /path/to/provisioning/profile(ii) Base64 encode the provisioning profiles
base64 -i 8c3a280b-dd70-4e37-8f6f-fa8533376357.mobileprovision -o encoded_1.txt
base64 -i 715e196f-7fdc-4f29-aa01-4ecfd1cac930.mobileprovision -o encoded_2.txt
base64 -i 7882e78f-0b95-4959-acd3-560c7f9f869f.mobileprovision -o encoded_3.txt
Create secret variables in your GitHub repo:
PROVISIONING_PROFILE_1: Add contents of encoded_1.txt
PROVISIONING_PROFILE_2: Add contents of encoded_2.txt
PROVISIONING_PROFILE_3: Add contents of encoded_3.txt
(iii) Export the Apple Development Certificate
a. Open Keychain Access app
b. Select “login” on left navigation panel, and select “My Certificates”.
Locate the certificate, export it as .p12, and pick a certificate password.
Create GitHub secret variables
APPLE_CERTIFICATE: Base64 encode the .p12 Apple Development Certificate, and add to this new GitHub secret variable
CERTIFICATE_PASSWORD: Add the password you picked when exporing the .p12 certificate into Github secret variable as well.
That’s it 👍. Real Device testing on Firebase Test Labs will now execute on each pull requests where the destination branch is main
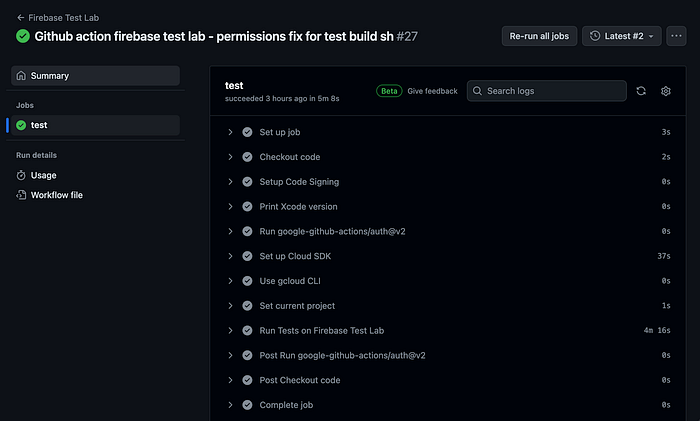
Screenshot of Github workflow action:

Sources: